Tmux + Claude GenAI: Coding Nirvana
Tmux has been a developer favorite for almost two decades. And now, in the age of agentic coding, it’s having a second act.
Picture your typical day with Claude. You’re running multiple projects in parallel — because coding agents don’t get tired and don’t need to “focus on one thing at a time.” For each project, you’ve got:
- One or more Claude sessions
- A few idle zsh tabs, waiting for you
- A server, a log tail, a build — each hogging its own shell
- Several git worktrees, multiplying everything above
Open all of that as plain tabs in Terminal.app or iTerm2, and within an hour you’re frantically hunting for the right one — or color-coding them into something your eye doctor will have opinions about. (Eye strain is real.)
Tmux fixes this.
A quick disclaimer: there are all-in-one alternatives like Cmux, and iTerm2 ships its own tmux-ish features. But if you already love tmux — or want to tweak things to your taste (a beautiful status bar plugin, anyone?) — stick around.
Irakli’s Setup
Here’s my setup. Borrow what you like. If you’re starting from scratch, this should get you going fast. And yes, you can point Claude at this post and let it do the work!
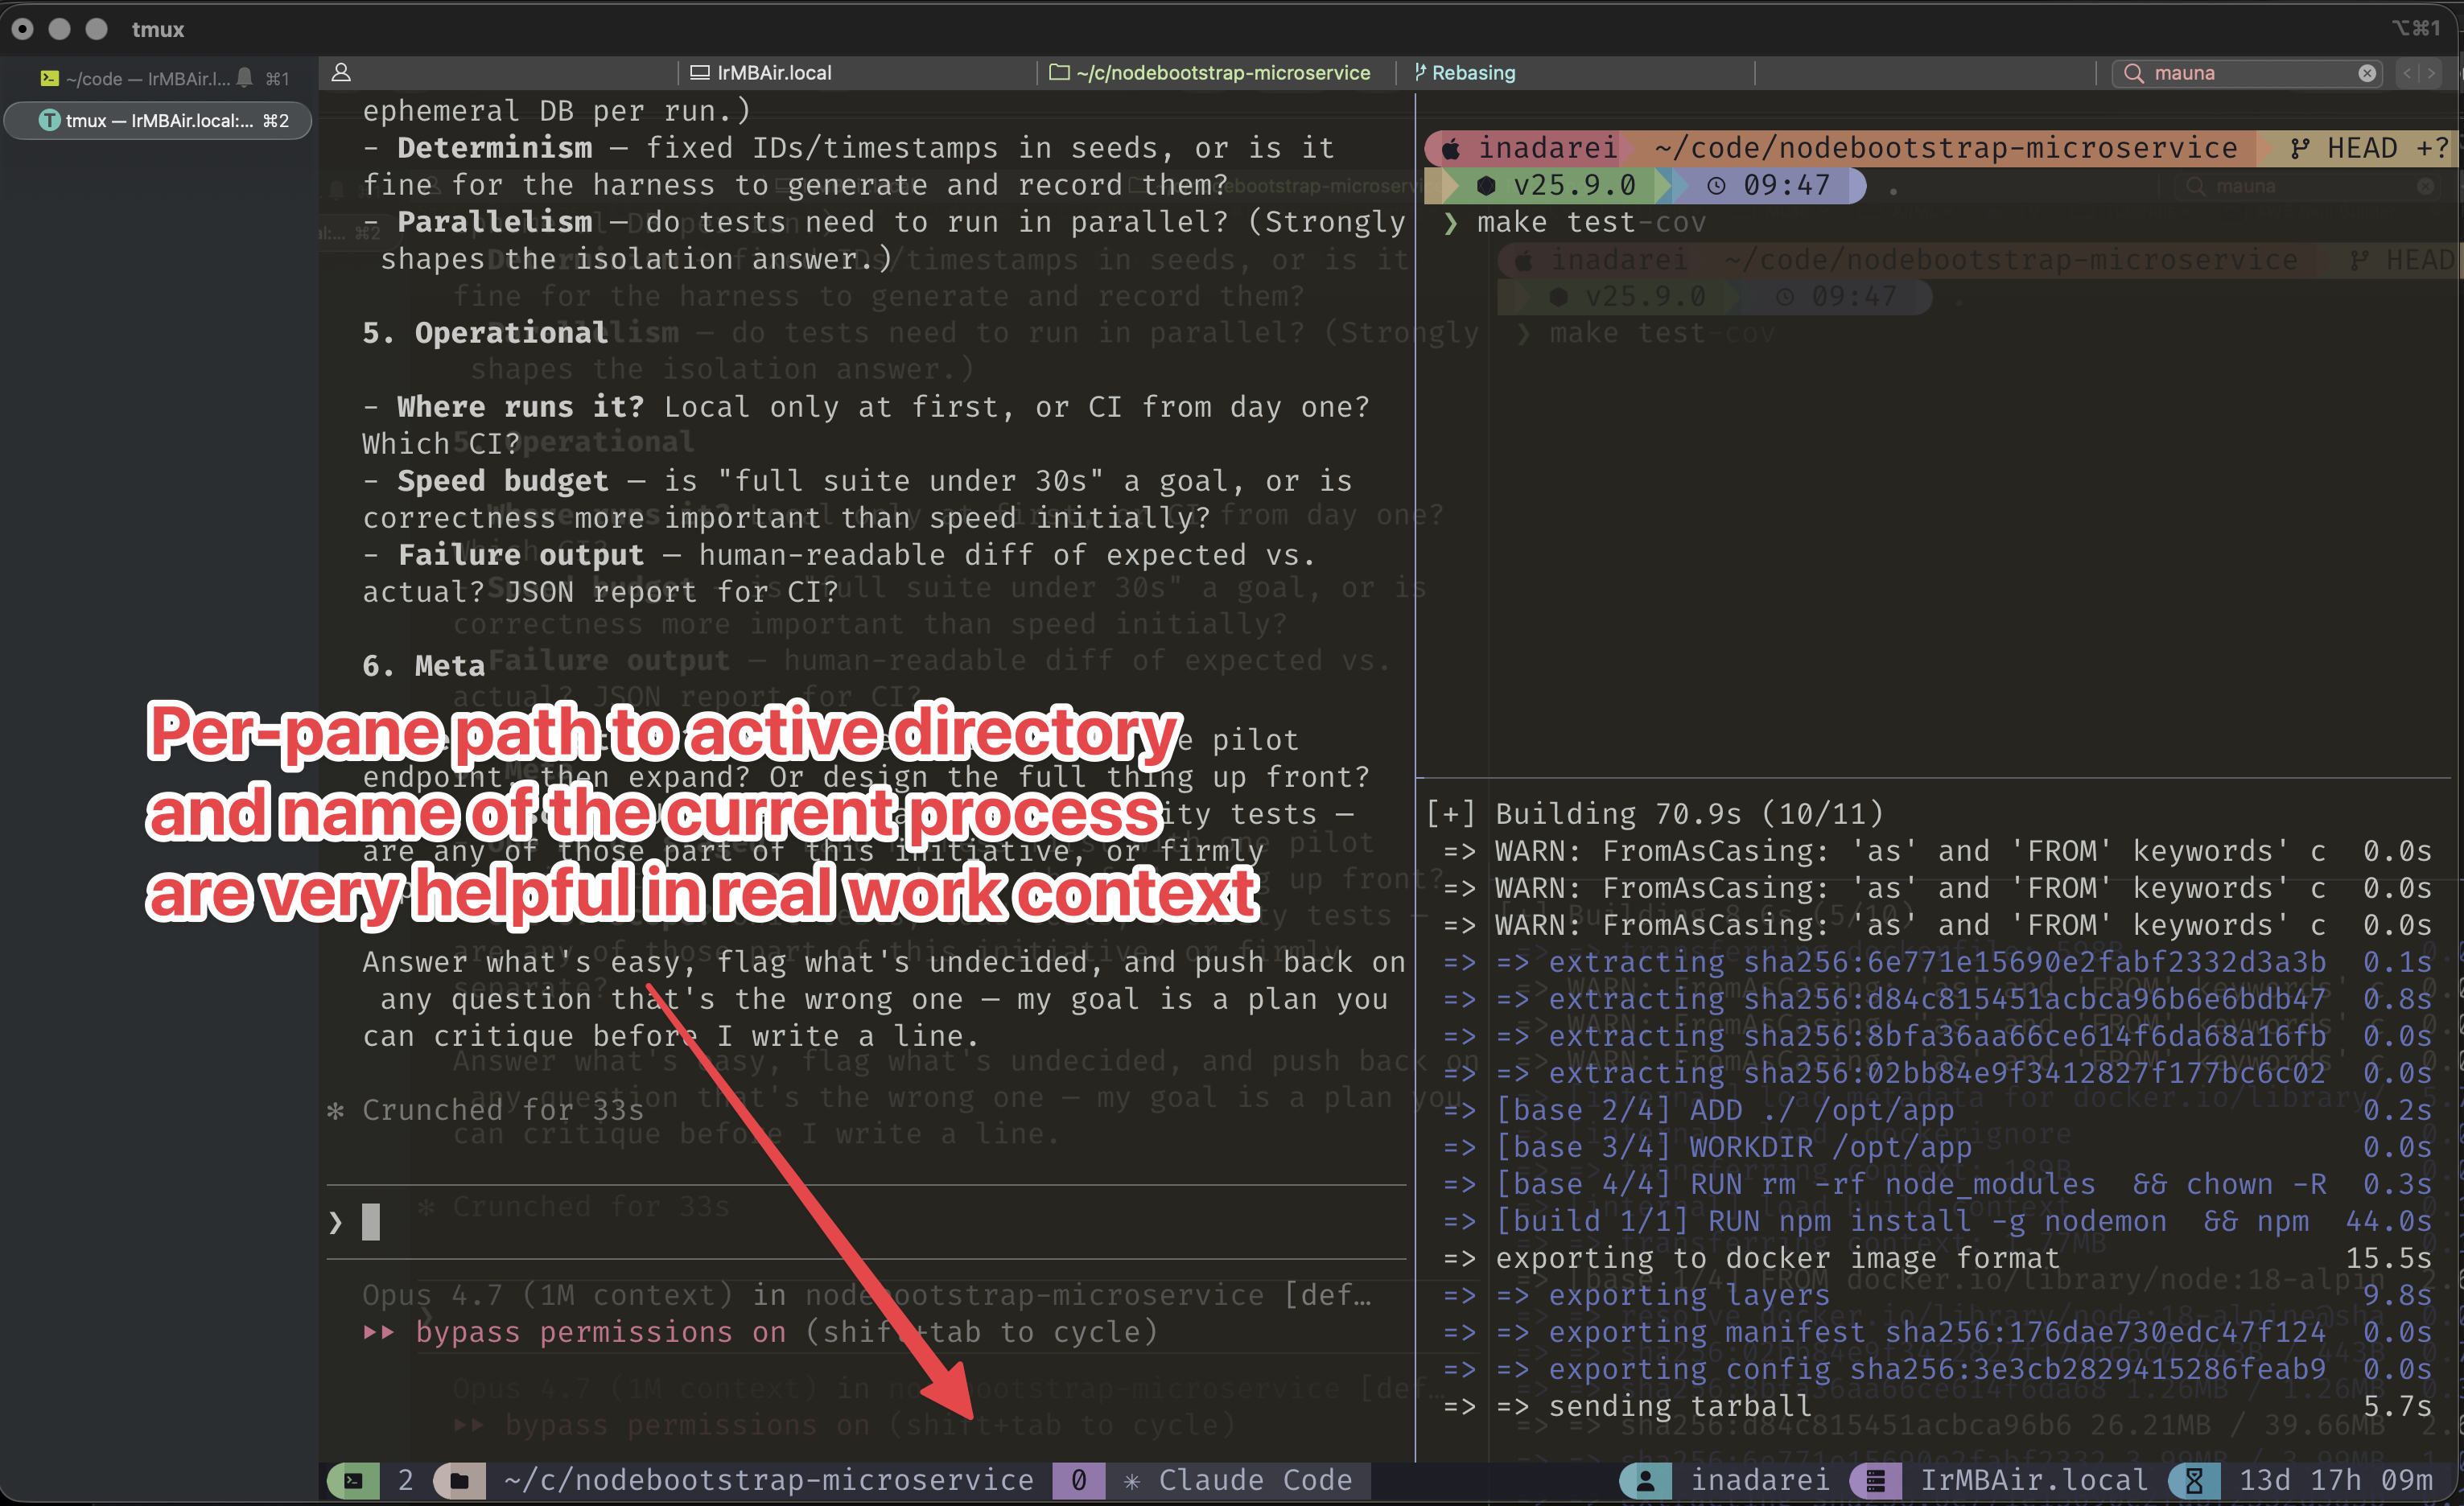
Before the grueling details, here’s the payoff — so you can decide whether to keep reading:
Installation
If you want to get everything workin as soon as possible, just run this installation script:
curl -fsSL https://www.freshblurbs.com/downloads/scripts/setup-tmux.sh | sh
If everything worked well, and you don’t want to keep reading detailed instructions, skip to iTerm2 Considerations and Essential Shortcuts
If the install script doesn’t work, for some reason, or you want to understand what exactly is being done, or you want to understand the setup so that you can adapt it for your own taste, here’s the detailed step-by-step, instead:
Detailed Walk-Through
# on Mac:
> brew install tmux

# on Debian/Ubuntu Linux
> sudo apt install tmux -y

# on Windows? Just kidding! Real programmers don't use Windows! ;)
Installing Plugins
We are going to install a number of plugins:
1. Catppuccin Status Line
A good status line is a critical part of the tmux experience. It allows you to quickly see the context (current folder, user, etc.) of each pane as you switch between panes, and catppuccin provides a beautiful and functional status line that integrates well with the overall theme.
The ability to see the current folder of the pane, even if the active app is not a shell but is a Claude session, is VERY helpful. You will be running many Claude sessions and every now and then, trust me, you will forget which folder that particular Claude is running in. Having that information in the status line, easily visible, is PRICELESS.
To install:
mkdir -p ~/.config/tmux/plugins/catppuccin
git clone -b v2.3.0 https://github.com/catppuccin/tmux.git ~/.config/tmux/plugins/catppuccin/tmux
Hint: make sure to run tmux source ~/.tmux.conf whenever you create or change the tmux config file, to make sure changes take effect!
Additional Essential Plugins:
- tmux-sensible: provides a set of default configurations that improve the user experience.
- tmux-resurrect: allows you to save and restore tmux sessions, which is incredibly useful for maintaining your workflow across reboots or when you need to close your terminal.
- tmux-continuum: provides continuous saving of tmux sessions, complementing tmux-resurrect.
- tmux-yank: allows you to copy text to the system clipboard easily.
Irakli’s Tmux Config
Before we get to showing the main config file, let’s explain some Tmux terminology, if you are new to tmux.
With Tmux, you can have multiple sessions running. To see a list of sessions, run tmux ls. Inside a specific session, you will have multiple “panes”. Once you are inside a tmux session, you tell tmux what to do with keyboard shortcuts.
Tmux keyboard shortcuts start with a “prefix”: a key combo that starts an action (by default: ctrl-b) followed by another key press that identifies the specific command. For instance, by default, to add a new pane on the right (“vertical split”) you would press ctrl+b (default prefix) and then release it and immediately press quotation mark ". For horizontal split, you would do ctrl+b and %.
In my biased opinion, the defaults are not ideal. I don’t find ctrl-b very convenient, so I, and as far as I know many others, remap the ctrl-b prefix to ctrl-space. I also can never remember " and % shortcuts, so I remapped them to “h” for horizontal and “v” for vertical. Make life simpler, right?
So, those remappings and plugin configurations are what my config file ~/.tmux.conf mostly is:
# -- Prefix: Ctrl-Space (easier than default Ctrl-b)
unbind C-b
set -g prefix C-space

# -- True-color terminal support
set -g default-terminal "tmux-256color"
set -ga terminal-overrides ",*256col*:Tc"

# -- Intuitive split bindings (h = horizontal, v = vertical)
unbind '"'
unbind %
bind h split-window -h -c "#{pane_current_path}"
bind v split-window -v -c "#{pane_current_path}"
bind c new-window   -c "#{pane_current_path}"

# -- Reload config with prefix + r
unbind r
bind r source-file ~/.tmux.conf

set -g escape-time 10
set -g history-limit 50000
set -g mouse on
set -g set-clipboard off

# -- Plugins
set -g @plugin 'tmux-plugins/tpm'
set -g @plugin 'tmux-plugins/tmux-sensible'
set -g @plugin 'tmux-plugins/tmux-resurrect'
set -g @plugin 'tmux-plugins/tmux-continuum'
set -g @plugin 'tmux-plugins/tmux-yank'

# -- Catppuccin status line
set -g @catppuccin_flavor "mocha"
set -g @catppuccin_window_status_style "rounded"
set -g @home "$HOME"
set -g @catppuccin_directory_text ' #{s|/(.)[^/]+/|/\1/|g:#{s|/(.)[^/]+/|/\1/|g:#{s|^#{@home}|~|:#{pane_current_path}}}}'

# -- Pass tmux session title on to the terminal (e.g. iTerm2)
set -g set-titles on
set -g set-titles-string "#S"

run ~/.config/tmux/plugins/catppuccin/tmux/catppuccin.tmux

set -g status-left-length 100
set -g status-left ""
set -ag status-left "#{E:@catppuccin_status_session}"
set -ag status-left "#{E:@catppuccin_status_directory}"

set -g status-right-length 100
set -g status-right ""
set -ag status-right "#{E:@catppuccin_status_user}"
set -ag status-right "#{E:@catppuccin_status_host}"
set -ag status-right "#{E:@catppuccin_status_uptime}"

run '~/.tmux/plugins/tpm/tpm'

bind-key -T copy-mode    MouseDragEnd1Pane send-keys -X copy-pipe-and-cancel "base64 | tr -d '\\n' | xargs -I{} printf '\\033]52;c;{}\\007' > #{client_tty}"
bind-key -T copy-mode-vi MouseDragEnd1Pane send-keys -X copy-pipe-and-cancel "base64 | tr -d '\\n' | xargs -I{} printf '\\033]52;c;{}\\007' > #{client_tty}"
Provisioning tmux for the first time
When you modify the tmux config file ~/.tmux.conf, you should run tmux source ~/.tmux.conf so new settings get parsed. You can run this inside a tmux session (if you don’t want to restart) or outside.
If you add a new plugin, you should also do prefix + Shift I, so with my settings: ctrl+space and shift+I.
iTerm2 Considerations
If you are using iTerm2.app on MacOS, for Tmux to work well, you need to make sure a couple of configurations are set properly:
-
Settings -> General -> Tmux -> Clipboard
Make sure “Mirror tmux paste buffer” is checked/enabled!
-
Settings -> General -> Selection
Make sure all of the following are checked/enabled:
- Copt to clipboard on selection
- Applications in terminal may access clipboard (Allow sending of clipboard contents: Always)
-
Settings -> Profiles -> your profile -> Terminal
Make sure all of the following are checked/enabled:
- Enable Mouse Reporting
- Report mouse wheel events
- Report mouse clicks & drags
- Terminal may enable alternate mouse scroll
-
Settings -> Profiles -> your profile -> General
Make sure “Applications in Terminal may change the title” checkbox is checked.
When you do this, iTerm2 tabs will adopt tmux session titles (which you can set with
tmux rename website-workor something)and that can be super convenient
Essential Shortcuts:
Reminder: prefix means ctrl+space in our config, and the default is ctrl+b.
- prefix + z
- Zoom in/out. If you have several panes and you want to make one of them “full screen” or go back to “see all panes” view.
- prefix + x
- Close pane
- prefix + h (overridden, default:
prefix+") - Add new horizontal pane
- prefix + v (overridden, default:
prefix+%) - Add new vertical pane
- prefix + d
- Detach but keep tmux running so you can come back
Further Comfort
If you fall in love with tmux and decide ALL your terminal sessions MUST have tmux so you never accidentally end up in a shell without one, you can add this to your ~/.zshrc:
# In ~/.zshrc, near the top
if [[ -z "$TMUX" ]] && [[ -n "$PS1" ]] && [[ "$TERM_PROGRAM" == "iTerm.app" ]]; then
  tmux attach -t main 2>/dev/null || tmux new -s main
fi
Also, if you “hate” remembering common tmux commands, you can alias them (I know I do):
alias ta='tmux attach -t'
alias tls='tmux ls'
alias tn='tmux new -s'