Docker for Microservices Survival Guide
Building your First Containers
Installing basic Docker tool-set is quite trivial on most platforms. On reasonably new versions of major Linux distributions you can add a repository provided by Docker.com and install Docker in one command from there on. “Reasonably new” means: distributions the kernels of which support LXC.
Since MS Windows and Mac OS-X obviously do not have Linux kernels, in order to install Docker, at the time of this writing, we need to first install a virtual machine containing Linux distro in it and then install Docker in Linux, bridging networks and doing other “fun” things to make the environment easy-to-use. You can try it manually or you can install a nicely put-together package provided by Docker. This package is based on Docker Engine and Oracle VirtualBox VM. VirtualBox is not the only VM engine that is supported with this setup. You can also use latest version of Parallels Pro/Business or VMWare Fusion, if they fit your needs or tastes better.
Interestingly enough, docker tool-set itself is an application that has client-server architecture. The docker CLI tool we use to execute most commands (“docker”) is an agent that talks to a corresponding daemon and passes our commands through. This is super convenient because it allows initiating docker commands locally even if they are executed “remotely”. For instance, if you work on Mac or a Windows PC, and install docker via Docker Engine bundle: you will not have to SSH into the virtual machine to run docker commands. You can still run docker commands locally in your terminal (OS-X) or powershell (Windows) and they get passed through to the docker daemon running on a Linux, inside the VM, serving as docker host.
Docker uses a special configuration file, called Dockerfile, to set up a container. A Dockerfile for setting up a Node.js environment may look like the following:
FROM alpine:3.2
MAINTAINER Irakli Nadareishvili

ENV VERSION=v4.2.1
ENV REFRESHED_AT 2015-12-27-22_00EST

RUN apk upgrade --update \
 && apk add curl make gcc g++ linux-headers paxctl musl-dev \
    libgcc libstdc++ python openssl-dev zlib-dev \
 && mkdir -p /root/src \
 && cd /root/src \
 && curl -sSL https://nodejs.org/dist/${VERSION}/node-${VERSION}.tar.gz | tar -xz \
 && cd /root/src/node-* \
 && ./configure --prefix=/usr \
 && make -j$(grep -c ^processor /proc/cpuinfo 2>/dev/null || 1) \
 && make install \
 && paxctl -cm /usr/bin/node \
 && npm cache clean \
 && apk del make gcc g++ python linux-headers \
 && rm -rf /root/src /tmp/* /usr/share/man /var/cache/apk/* \
    /root/.npm /root/.node-gyp /usr/lib/node_modules/npm/man \
    /usr/lib/node_modules/npm/doc /usr/lib/node_modules/npm/html \
 && apk search --update
You don’t need to worry about understanding every single line of this file, but as you can see it is very similar to a shell script and achieves several major tasks:
- At the very beginning it declares that the new container should be created based on an existing container. In this case: Alpine Linux container at version 3.2. Alpine is a super-slim Linux distribution (around 5MB) that is popular among Docker enthusiasts who care for creating super-small containers. In comparison, the smallest Ubuntu container is typically couple hundred megabytes.
- Further we declare some environmental variables that can be used during build process. In this case we abstract-out the version of Node we need installed. This way we can use the same Dockerfile to build various versions of Node containers, by modifying the variable in only one spot.
- Last, but not least, we execute a number of shell commands using the RUN instruction to get Node installed and to perform some post-installation clean-up. You may notice that we have coalesced many commands into one. Alternatively, we could have written a RUN command per each shell command. The reason we didn’t do it is: each RUN command creates intermediary containers. This can be super useful while debugging your Dockerfile (you can resume execution from the last RUN command) but may not be what you need in production. A lot of production Dockerfiles use the trick of merging multiple shell commands into a single RUN command, but it’s not a necessity.
Docker Survival Guide
Building a Docker Image
Once we have a Dockerfile, we can get in the folder where it is located and run the following command to build the Dockerfile:
> docker build -t nodejs .
the -t flag allows us to give the newly minted image a nice name (‘nodejs’ in this case). Once the building process is done, you should be able to see the newly minted image at the top of the images list: 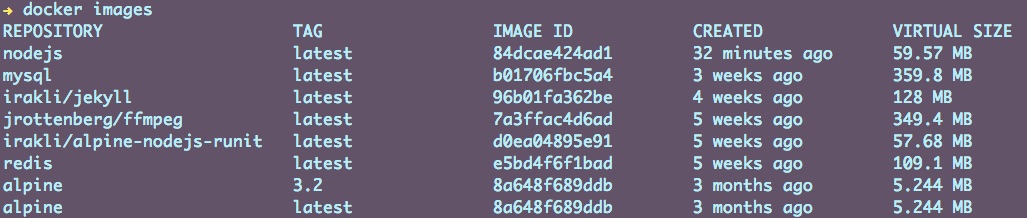
Running a Container
We can run a container from any image whether local or remote. The “docker images” command shows local images, but there’re thousands more on Docker Hub that we can also run. Let’s first see how to run a container from a local nodejs image we just built:
docker run -ti nodejs /bin/sh
The ‘-ti’ combination of options ensures that the container starts with a pseudo-TTY, in an interactive mode. Following these options is the parameter that indicates which Docker image to start a new container from, which is: “nodejs”, in our case. The last parameter indicates what command to execute once the container is started. In our case that is: /bin/sh interactive shell, which we use to verify that the newly minted container does indeed have working node installation:

Please note that in Docker, you can only indicate one executable command during a container startup. Containers are not like VMs, in that: you are not supposed to run multiple processes per container, not really. Technically, you can still do it, by making the “one command” you execute be a process launcher (such as: runit init daemon) and then let the process launcher spawn other processes. Such “trickery” is not necessarily unheard of in the Docker world, but it is certainly frowned upon as it breaks the “UNIX philosophy” of shipping containers that “do one thing, and do it well.”, which we have already mentioned.
Mapping Ports and Volumes
Let’s create a container that is slightly more useful than what we did in the previous section. We’ll start by writing the world’s simplest Node server. If Node.js is not your kind of pie, don’t worry about it: the source-code is quite self-explanatory and the Node code per se, isn’t terribly important anyway.
Create some empty folder and put the following file inside it, by naming it: server.js:
var http = require('http');

var server = http.createServer(function (req, res) {
  res.end("Hello, Docker Enthusiast!\n");
});

server.listen(3000);
The gist of the script is that: it will launch a server on port 3000 and respond, to any HTTP GET request, with a welcoming message.
Let’s now see how we could launch this Node script using the node environment from the container.
This is an interesting case. We mentioned how Docker’s (containers’) main benefit is: creating installable packages for complex applications. That assumes that the application code will be part of the container image as well. Well, yes and no. For production deployments, the statement is certainly true. However, while we are actively developing code, if we had to rebuild the image every time we edit source code we would waste a lot of time and get annoyed pretty quickly. Especially those of us who use scripting programming languages a lot and have long forgotten what it feels like to wait for a build step after every code change.
Long story short: we don’t have to rebuild the image after every code change. Instead, what we can do is: mount host machine’s location into the container, launch the container once and then edit the source code “locally” as much as we desire.
To do so, in the folder where you created server.js, create a new Dockerfile:
FROM irakli/alpine-nodejs:latest

RUN mkdir /home/app && npm install supervisor -g
WORKDIR /home/app

ENTRYPOINT [ "/usr/bin/supervisor", "-w", "." ]
Several things to note here:
- We are building our new contianer image based on a published image, at DockerHub: https://hub.docker.com/r/irakli/alpine-nodejs/. If you follow the web URL to the DockerHub project, and then click on the “Dockerfile” link, you will notice that it is very similar to the one we wrote, earlier in this chapter. I just want to show you that the base images don’t always need to be local and docker will fetch them from remote registries, as needed.
- Next command, in the Dockerfile, tells Docker to create a folder where we shall store our code and to install a Node module which provides hot-reloading capabilities. While Node is a scripted language it actually caches interpreted code and without this handy utility, we’d need to restart the server, every time we change code. That wouldn’t help what we are trying to demonstrate here (real-time code editing in a container).
- The WORKDIR command changes current working directory. It’s somewhat identical to “cd” in Unix/Linux.
- The last command in the Dockerfile is an interesting one. We already mentioned that you can indicate which command to execute, as the main container process, in a Dockerfile rather than on the command line. The Dockerfile instruction for it would be: “CMD”. Here’s a pro-level twist to the story, however: we don’t want to indicate a fully-flashed-out command. We’d like to leave the name of the Node script as a parameter. This is where ENTRYPOINT command enters the scene: it is like CMD, but it will append whatever we indicate on the command-line (in a ‘docker run’ command) to the predefined starting portion of the shell command. You may also notice that the argument of the ENTRYPOINT instruction is an array, rather than a string. Both in case of CMD and ENTRYPOINT, Docker recommends passing different parts of the shell command as an array of arguments, instead of: one long string.
To build this new container images, type:
docker build -t node-code .
which will create a new image called: “node-code”. You can verify that it exists by typing: “docker images”.
Finally, to launch the container, type the following command:
docker run -p 9999:3000 -v $PWD:/home/app node-code \
       /home/app/server.js
You will notice that we are using some new options we haven’t used yet.
- The “-p” option allows us to re-map the port on which a service exposed by the container is available on the host. Meaning: if you remember the server.js’ source code: the service was running on port 3000. What if port 3000 is already occupied on the host, however? Or if we have some other reason why we don’t want to use 3000? No problem. A service can run on whatever port, inside the container, and we can expose it on any other, un-occupied port, on the host machine.
- the “-v” option mounts current local folder on the host (where server.js is) to
/home/appfolder inside the container. The it instructs Docker to append"/home/app/server.js"` argument to the launch command already provided in the ENTRYPOINT, which will make the final executed command like something like:
/usr/bin/supervisor -w . /home/app/server.js
Once the container launchs successfully, you can go to the IP of your host machine. The IP will be: 0.0.0.0 if you are Unix/Linux or the IP of the docker machine if you are running Docker host via Docker Machine, on OS-X or Windows. To find-out what is the IP of the currently running docker machine, on OS-X you can run something like:
docker-machine ip `docker-machine active`
Once you know your Docker host’s IP, point your browser to:
http://<ip-address-of-the-host>:9999/ and you should see the cheerful greeting.
Now try to edit the server.js, e.g. by adding a smiley face to the greeting:
res.end("Hello, Docker Enthusiast! :) \n");
Once you refresh the web page, you should see the new greeting with the smiley face!
Congratulations! You just coded and launched your first, containerized microservice! Exciting, right?
Docker Compose – Linking Containers
Aside from making code development, with containers, much easier the volume mounting capabilities of Docker (“-v” option) can be very useful for persisting data. You have to remember that Docker containers are inherently ephemeral: once the container process dies, everything is gone. If you are writing to some files within the container - they will disappear. That is not that great if you are writing a database-driven application, now - is it?
Volumes can help solve this problem, but before we dive into it, we need to explore the architecture of a database-backed, containerized application, a little further.
If you remember the “unix philosophy”, adopted by Docker, that we keep mentioning – putting a database and application in a single container is an extremely anti-Docker-y thing to do.
To do such thing properly, we need to launch a database in one container, application – in another and let the two containers “find” each other, also known as: link the containers, in Docker-world.
We can still do such things using docker executive, but there’s a significantly more elegant and easier way to orchestrate containers, when we deal with multiple. This ellegant tool is called: Docker Compose.
Docker compose uses YAML-based configuration files to orchestrate complex scenarios. For instance, if we need a Node.js app and a MySQL database, the corresponding Docker Compose configuration file, named docker-compose.yaml might look something like the following:
api:
  build: .
  volumes:
    - .:/opt/application
    - /opt/application/node_modules
  ports:
   - "5000:3000"
  links:
    - db
db:
  image: mysql
  volumes:
    - /data/mysql:/opt/data
  environment:
    - MYSQL_ROOT_PASSWORD=rootpwd
    - MYSQL_USER=mysqluser
    - MYSQL_PASSWORD=mysqlpwd
    - MYSQL_DATABASE=onoroff
As you can see, we are making sure database files will not be lost by mounting a folder on the host filesystem into the “db” container.
If you are wondering why do we have second instruction with - /opt/application/node_modules in the volumes
description - the answer is: so that volume mounted from the host doesn’t overlap and hide, at runtime, node_modules
folder which is created during build-time. This is a well-known and elegant trick.
Data-Only Containers
While using host folder mounting for data persistence is an acceptable approach, it is actually not the current best-practice in the “Dockerworld”. Big part of the reason being: while volume-mounting for the “api” is only for local development, we’ll have to perform volume-mounting for the database, even in production and host machine directly sharing disk space with the container is not an ideal level of isolation we are seeking. What if some other service also tries to write into /data/mysql on the host machine? T.R.O.U.B.L.E.!
Instead, what experienced Docker practitioners usually do is: creating so-called, “data-only” containers and using its volume in a database container. This approach gives us the best of both worlds: since “data-only” container is never launched, it won’t crash and its longevity is practically identical of the longevity of the host itself. On the other hand the disk space is encapsulated in a specific container and the chances of some service accidentally accessing it are much lower.
Let’s see how a Docker Compose file with data-only container may look like:
api:
  build: .
  volumes:
    - .:/opt/application
    - /opt/application/node_modules
  ports:
   - "5000:3000"
  links:
    - db
db:
  image: mysql
  volumes_from:
    - db_data
  environment:
    - MYSQL_ROOT_PASSWORD=rootpwd
    - MYSQL_USER=mysqluser
    - MYSQL_PASSWORD=mysqlpwd
    - MYSQL_DATABASE=ourawesomemicroservice

db_data:
  restart: always
  image: alpine:latest
  volumes:
    - /var/lib/mysql
  command: "true"
As you can see, for the data-only container, we are using tiny Linux distribution – Alpine, size of about 5MB, and the command being executed is “true”.